How to Build a FREE Website with Squarespace 2024
Guys - its 2024. We’re all out here with our side hustles trying to cut costs as much as possible and save that coin. So OBVIOUSLY you need to know how to get a website… FOR FREE!
And today I’m going to show you exactly how to create a professional website for yourself using Squarespace for exactly zero dollars. 😉Rather watch instead of read?
Here’s that video for ya!
Hey! If you don’t know me, my name is Ranita - I’ve been designing with Squarespace since 2020, and I’m the creator behind Gold Standard Design.
If you're a creator, blogger, podcaster, or solopreneur looking to dive into the world of Squarespace - I’ve got you covered.
Before we jump in I want to talk a little bit about who Squarespace’s free website is ideal for. Squarespace calls this a Bio Site, and it’s similar to a Linktree.
You can put all your links in one place including your podcast, Instagram, Tiktok, Youtube, Spotify - you get the picture. You can also accept payments through Paypal and track analytics to “measure your progress” and “plan your next move”.
Basically if you’re trying to grow your brand you get access to all the nerd stats to see how you’re doing and improve.
So is this a full-fledged website where you can host a blog or a course? No. But that makes it perfect for anyone who doesn’t need those features and doesn’t want to pay for them. Artists, musicians, podcasters, or even anyone just starting out on their creative journey who doesn’t want to shell out their hard earned doll hairs for a big website they don’t need yet.
Ok, let’s see how to actually build this thing.
Head to Squarespace

From the Home page go to ‘Products’

Then click on ‘Bio Sites’

Then click ‘Create a free Bio Site’

From here you’re going to choose your User Name (the site will let you know if your chosen User Name is already in use and will prompt you to choose another one).

Now you’re going to sign up for an account either with your Google account or your email address.

Now Squarespace will prompt you to choose a template. Scroll through their selection and if one catches your eye - great! Go ahead and use it.
But if you’re not quite sure which one to choose - don’t worry, it’s not a huge deal. Just like with regular Squarespace website templates, you can pretty much make them all do the same things. It’s just that choosing a template can save you a few steps down the line, but it’s nota make or break situation.

Now you’ll add your Profile Picture and Name…

…any social media account you want to link to…

…and any other type of links.

Woohoo! Your FREE Bio Site is now live!
If you’ve uploaded everything you need and are all done customizing - perfect! You can hit the little squares button (where the red arrow is) to copy the link to your site and publish it anywhere you want.
If you’d like to add a few more finishing touches you can click the ‘Continue Editing’ button.
Wondering how to get found easier on Google?
You might want to check out my FREE list of how to improve your Squarespace website’s SEO.
It includes super easy tips on how to tweak your website to max those search rankings and get more eyes on your content quicker.
Click here to download your
FREE checklist now!


If you’re ready to continue editing, first up will be your Profile section.
Here you can add more images, a description for your site, and play around with the different layouts.
I went with a layout from the Creative section, but any changes you make you’ll be able to preview in real time in the right-hand pane.

Next you’ll be able to add or edit any links you want on your Bio Site. Feel free to add as many as you’d like! Each one will show up as a button in the preview pane on the right.

Next up is the Style section, which is my favorite to play with. Here you’ll be able to choose your colors and fonts.
You can either choose from Squarespace’s preset color combos or if you’ve already got brand colors you can enter the HEX codes in the Custom tab.
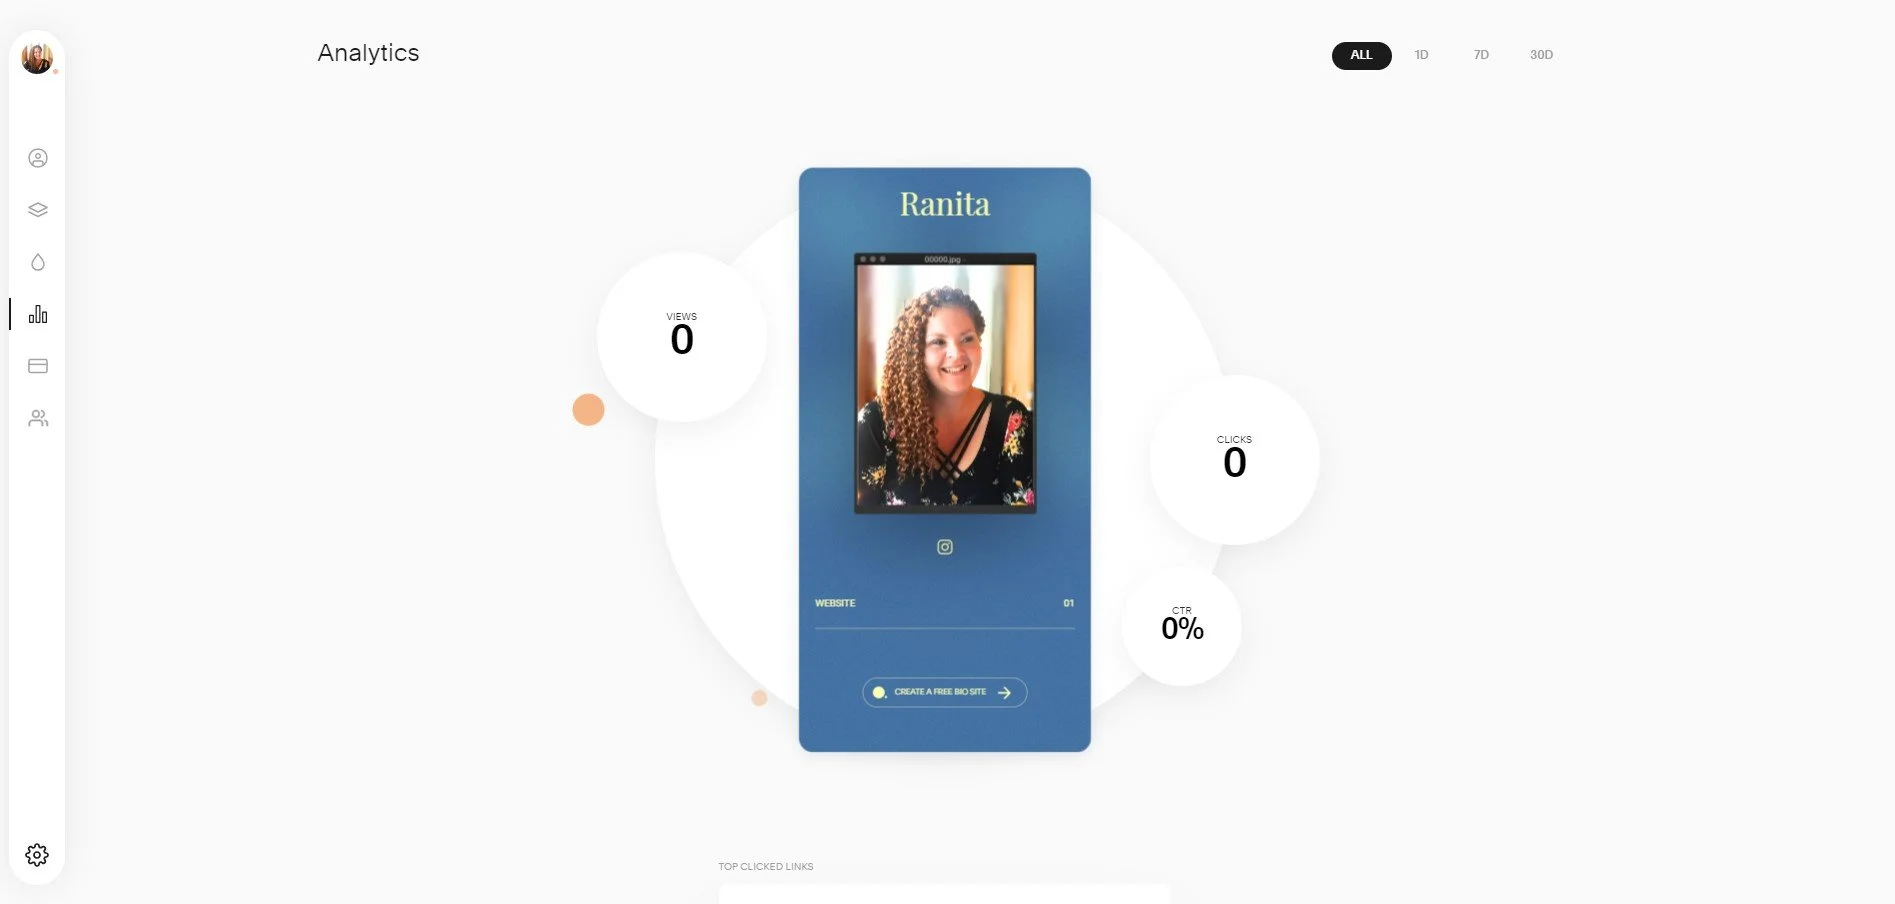
Next up is the Analytics section. Obviously my site just went live, so there’s no data to track quite yet. But once the site has been up for a while, you can come back here to see how many views or clicks you’ve gotten and track all the stats.

Here in the Payments section is where you can connect your Stripe or Paypal account to give your followers a way to give you a tip or set up a Crowdfunding campaign.

Just click on the ‘Add Payment Provider’ button to connect your accounts.
Then down below you can upload any images to go along with your tip/crowdfunding, edit your button text, and choose pre-set amounts for people to give to you.

Lastly in the Audience section you can create a way to capture emails and/or phone numbers to add to your mailing list.
If you don’t already have a mailing list set up I highly recommend it - even if you don’t think you’ll need it. Trust me on this one - it will be very helpful for you down the line so why not go ahead and set it up now?

You can choose which pieces of information you’d like to collect - Name, Email, and Phone.
You’ll also be able to add an image and description specifically for this section as well, and feel free to edit your button text and post-submission message to match the vibe you want.
Wrap Up
Ok! Not too bad, right? Now you know how to build your own site for absolutely free using Squarespace.
