Build a Professional Website for your Business YOURSELF!

Have you been wanting to make a website for yourself but haven’t because you thought it might look a little too DIY?
Or maybe you’re just not sure where to even start!
Don’t worry - with the right tips, it’s not as hard as you might think.
And in this post I’ll be giving you those tips and walking you through how to build a professional website for yourself.
Rather watch instead of read?
Here’s that video for ya!
Hey guys - welcome or welcome back! If you don’t know me, my name is Ranita - I’m a website designer who loves teaching people about Squarespace, and I’m the creator behind Gold Standard Design.
If you're a creator, blogger, podcaster, or solopreneur looking to dive into the world of Squarespace - I’ve got you covered.
Ok, so what do I mean by a “professional website"?
I mean one that DOESN’T look like a complete beginner made it. You know, the ones that are just kinda meh?
Yeah, not that.
Even if you have zero experience in website building, Squarespace makes it super easy to create a beautiful and professional looking site pretty quickly.
And no, this is not sponsored! I just love using Squarespace.
Although shoutout to Squarespace - if you want to sponsor your girl I’m here for it!
Just saying…
Ok, so go create your Squarespace account and let’s jump into this.
**DISCLAIMER**
This is a pretty visual-focused post, so for a more comprehensive tutorial check out the YouTube video linked above!
Templates
So one of the first things you’ll be prompted to do is give a general category for your website.

After that you can pick your site’s goals (things like sending invoices or selling physical/digital products.)

Don’t worry too much about either of these, but if you have a specific category or goals you can certainly pop them in here.
Next you’ll be prompted to either build a custom website with Squarespace’s AI or pick a template, with some suggestions made for you.
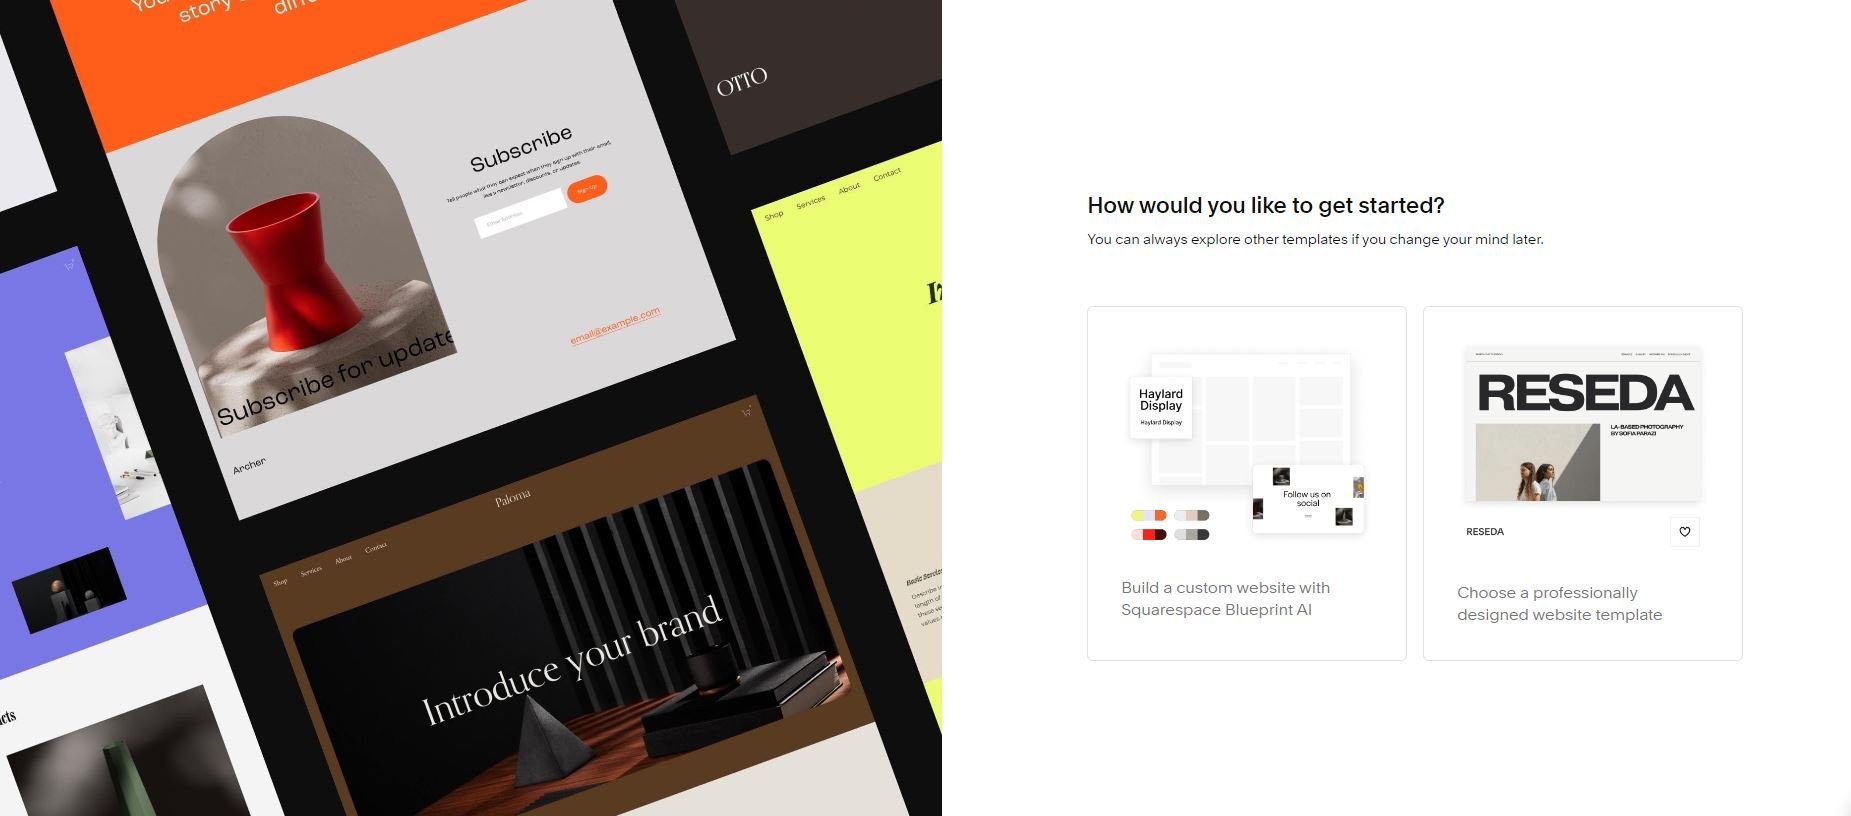
I suggest choosing the template option simply because you’ll be able to have more control over the feel of your site.
Here’s where you’ll be given your suggested templates based on the category and goals you chose earlier.

If this list of suggestions feels too restrictive, fear not!
Squarespace is just trying to help you combat the feeling of overwhelm.
Clear out any selected types or topics and just browse their entire catalog.
Scroll through and pick a style you like (look at the fonts and colors), but keep in mind all of this can be changed.
A template is just a jumping off point that will get you a few steps ahead of the game.
After you’ve chosen a template you like, Squarespace will get to work building your site.
This can take a few moments, so hang tight!
Once your site is built we can now navigate through the different page types.
Page Types
The first thing to notice is the Main Navigation vs Not Linked sections.

Any pages in the Main Navigation section will show up in the header of your website (think Home, About, Services, Contact, etc.)
The Not Linked section is a collection of pages that exist on the site but aren’t in the top navigation (things like Blog content, opt-in pages, an FAQ section, etc.)
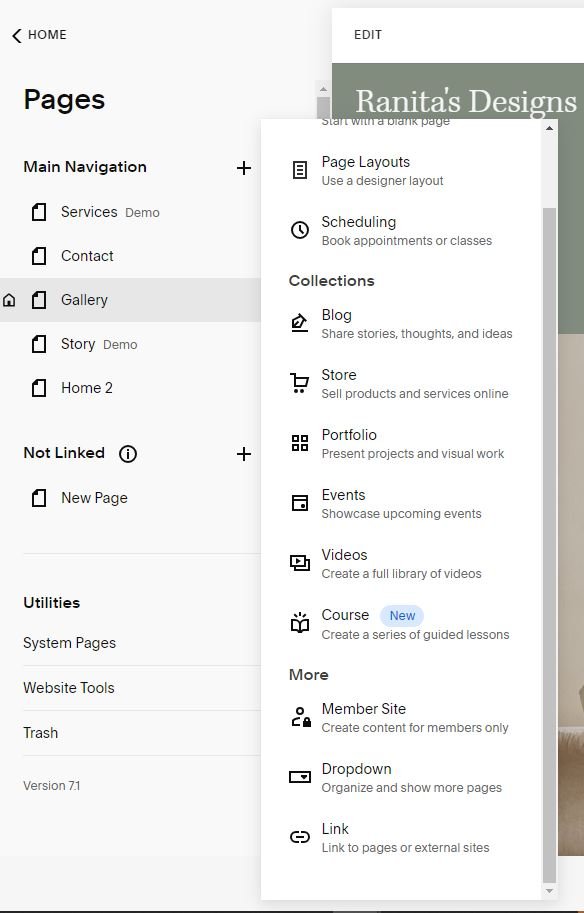
Clicking the + button will take you to a list of all the page types you can add.

*One quick note:
Under the Page Layouts section you will find quite a few page templates for things like an About page, a Services page, an FAQ page, etc.

My advice is to steer clear of these presets.
Why is that?
Because even though it seems like a great idea and such a time saver, your website will end up looking just like everyone else’s - which is NOT giving what we want to give.
Instead, I suggest going with a Blank Page for most things (with the exceptions being a Blog, Portfolio, Store, etc.)
A quick note about the less common page types you may want to use:
Scheduling
Useful when you want people to be able to book time with you - whether that’s a phone call, appointment for in-person service, calendar block, etc.
Portfolio
This is one main page with different subpages inside. Probably the most common use-case is for artists/photographers showcasing their past projects, but you can use this page type for a variety of things.
Events
If you’ve got a calendar that shows your events (maybe you’re a food truck that moves to a new location every day or a band playing shows) you can put all those here so people have one spot to access your calendar.
Videos
Pretty self explanatory - this is a collection of videos you want to store on your site like a library. You can also embed videos from YouTube and Vimeo here if you don’t want to pay for additional storage on your site.
Course
This is similar to a blog layout, but you can add a paywall to your course pages. Add your content, lessons, and chapters and then lock it up for only the special few to access!
Member Site
This is kind of like a site within a site. Any pages you add here are automatically hidden from the rest of your website and must be paid for before they can be accessed (unless you want to offer free memberships.)
Dropdown
This feature used to be called a Folder, and just like a real life folder it holds and organizes your pages.
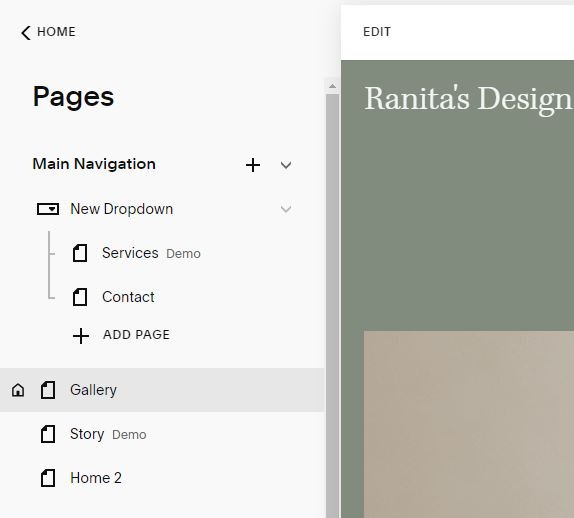
You can see here I’ve added a New Dropdown in my Main Navigation section with my Services and Contact pages underneath.

Now when you hover over New Dropdown in my Top Navigation you’ll see Services and Contact appear underneath.
Link
Simple as it sounds - this will create a direct link to whatever you want. It’s useful if you want a link directly in your top navigation, otherwise I would just use a button or text link within a page.
Styling
I recommend creating a blank page first to be able to play with your site styling. This method will let you see how all your fonts and colors will look across your entire site.
First, add your blank page then click Edit.
Then add a Blank section and a Text block.
Within that text block type ‘Heading 1’.
You will see a menu appear above your text.
Within that menu click the pencil and change the drop down menu to say ‘Heading 1’.

Copy that text block and enter ‘Heading 2’, then change the styling to Heading 2. Repeat this process until you have one text box for each text style.

After that add your buttons (Primary, Secondary, and Tertiary) and repeat the process.

Now copy the entire section but change the background color.


Repeat this process for each color in your palette. This is so you can see what all your text and buttons will look like on each color background.
I know this might seem tedious, but getting it out of the way now will save you tons of time later on.
General Advice
When it comes to your Top Navigation keep it simple. We can get creative elsewhere.
Use labels like Home, About, Blog, Shop, etc.

You want to keep this section easy to look at and so visitors can quickly find what they’re looking for.
Also, if your titles are too long they’ll start to wrap (especially on mobile view) which doesn’t look good.
It looks pretty amateur and DIY - which is NOT the look we’re going for.
One thing you do want to keep in mind as you’re building your pages is to keep your photos and images to 250kb or less to make sure your pages load quickly.
If you want more info about why that’s important, go check out the video right here!
Rather read the blog post instead? I got you!

Also keep in mind that the name of your pages will be their URL slug.


Wondering how to get all your content prepped and ready to pop into your beautiful new website?
You might want to check out my FREE
Squarespace Website Prep Guide!
It will guide you through each step of the process including:
writing copy for your pages
gathering pictures and images
doing research on your competition
So check it out!
It’s free!

Saved Sections
Ok, so one thing I’ve found really helpful and cool is this Saved Sections tool that Squarespace has.
Let’s say you’ve created a section on one of your pages that you want to reuse somewhere else. You just select the section, click the heart button, and now it’s saved to your Favorites.

Now if you want to pop that exact section in on another page - you just click “Add a Section” and go to your “Saved Sections” area. So quick and easy!


Connect Social Media
If you want to connect your social media accounts to your website simply add a block:

Scroll down to Social Links:

Click the pencil, and connect your accounts:

Because this is a normal block, you can add these wherever you want!
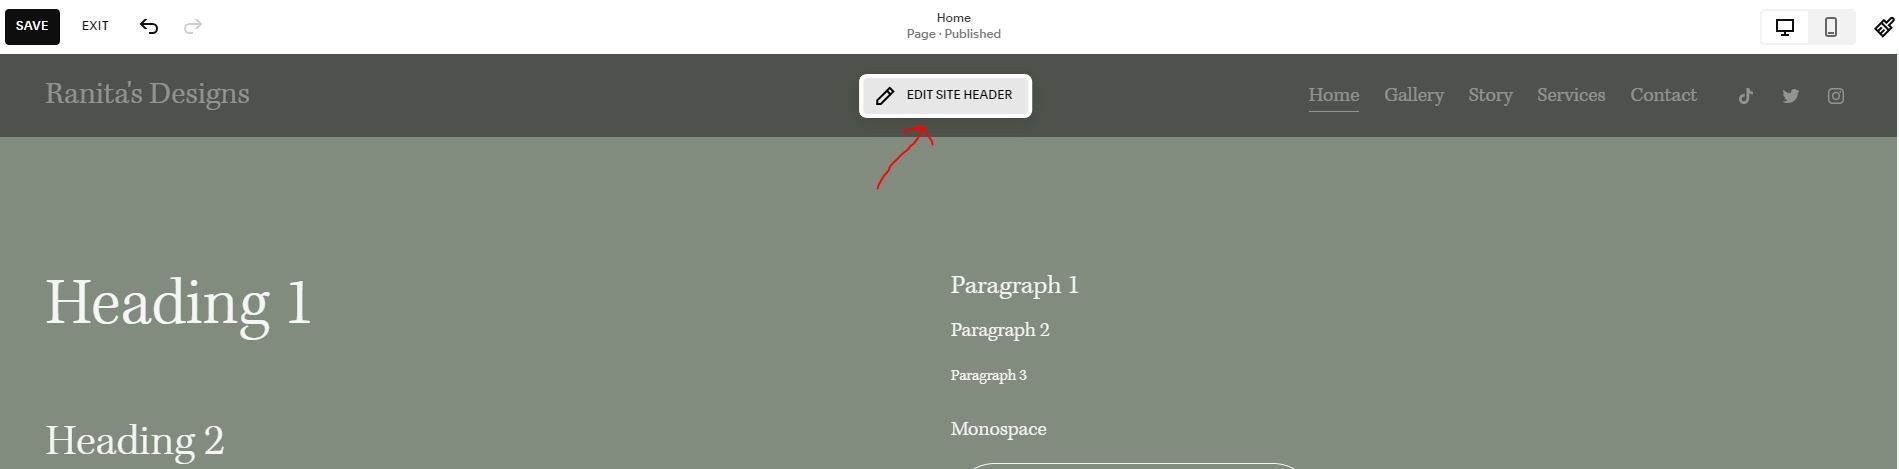
One great place to put your social links is in the header of your site.
To do that, just hover over your header and click Edit Site Header:
Click Add Elements:

And turn on Social Links. Easy peasy!

Upload Custom Logo
The header is also the place to add your logo, if that’s something you want to do.
While editing your header, hover over your Site Title in the top left corner and click the pencil.

Here is where you can upload your logo or edit your Site Title.

Play around with this to see how your logo looks.
You might decide it looks better to leave this as just text and feature your logo elsewhere on your site as an Image block.
Add a Favicon
One more suggestion I have to take your site to pro level is adding a favicon.
Never heard of it? That’s ok.
Most people don’t refer to it by name, but you know it when you see it!
A favicon is the little image that shows up in the browser bar of a website.
Squarespace defaults to a black cube favicon, but you can see that sites like Canva and YouTube have their own recognizable images.

To add your own favicon you want to go to Home:

Click Settings:

Then Favicon:

Here you can upload your image (which Squarespace recommends to be between 100x100 pixels and 300x300 pixels.)

Do keep in mind that it may take a few days for your favicon image to show up in the browser bar.
Clearing your cache can speed this up a little bit, but don’t get too worried if it doesn't appear immediately.
Wrap Up
Ok guys, it’s time to go build your beautiful, unique, professional websites!
Once your site is published and live, leave your link down in the comments! I want to see what you guys are doing and just how creative you are!